How to Connect Zaturn to Shopify
Connect your Shopify store to Zaturn and let Alex publish the SEO-optimized blogs for you.
Alex is your SEO expert. Once connected to your Shopify store, he can publish SEO-optimised blog articles directly from Zaturn, complete with the right slug, meta title, meta description, and schema markup already in place. No copy-pasting. No reformatting. Just approve and it goes live.
What You'll Need
Before you start, make sure you have:
A Shopify store
Access to your store's admin (owner or staff with Apps permissions)
A Zaturn account
The setup takes about 5 minutes and you only do it once.
Step 1 — Create Your App in the Shopify Dev Dashboard
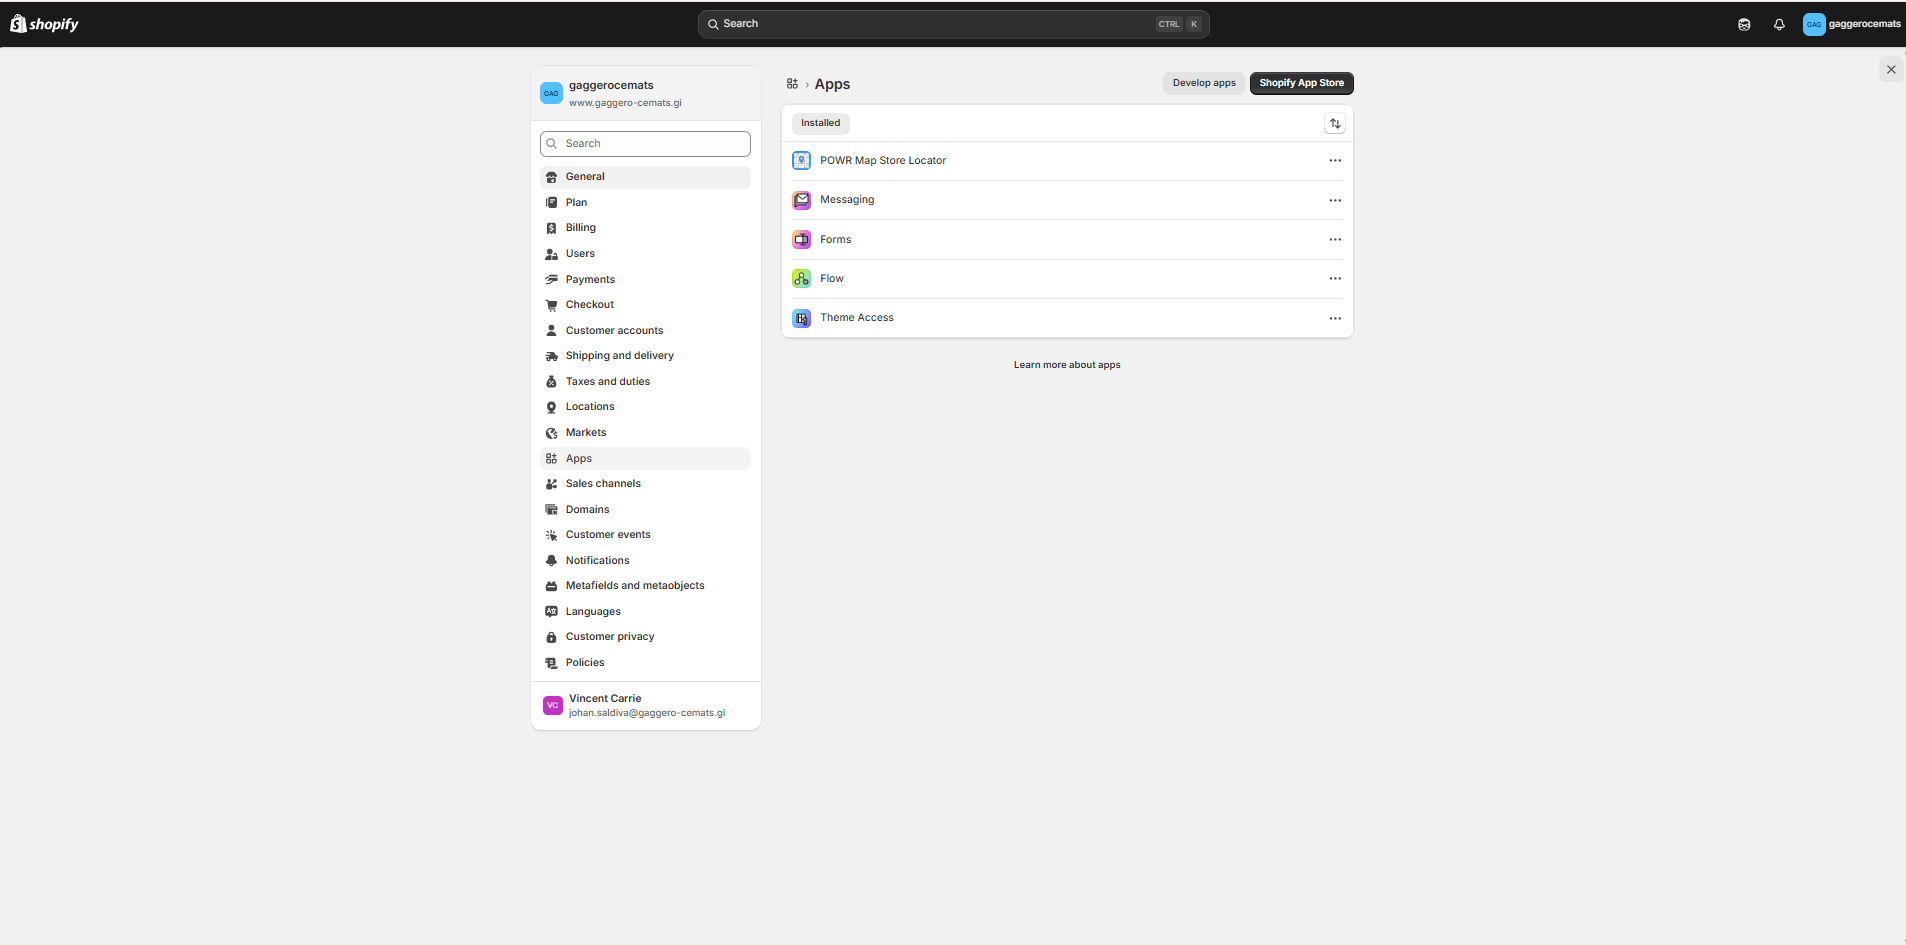
Login to your Shopify Stiore and click Settings (at the bottom of the side bar) and click Apps
Click at the " Develop apps " button
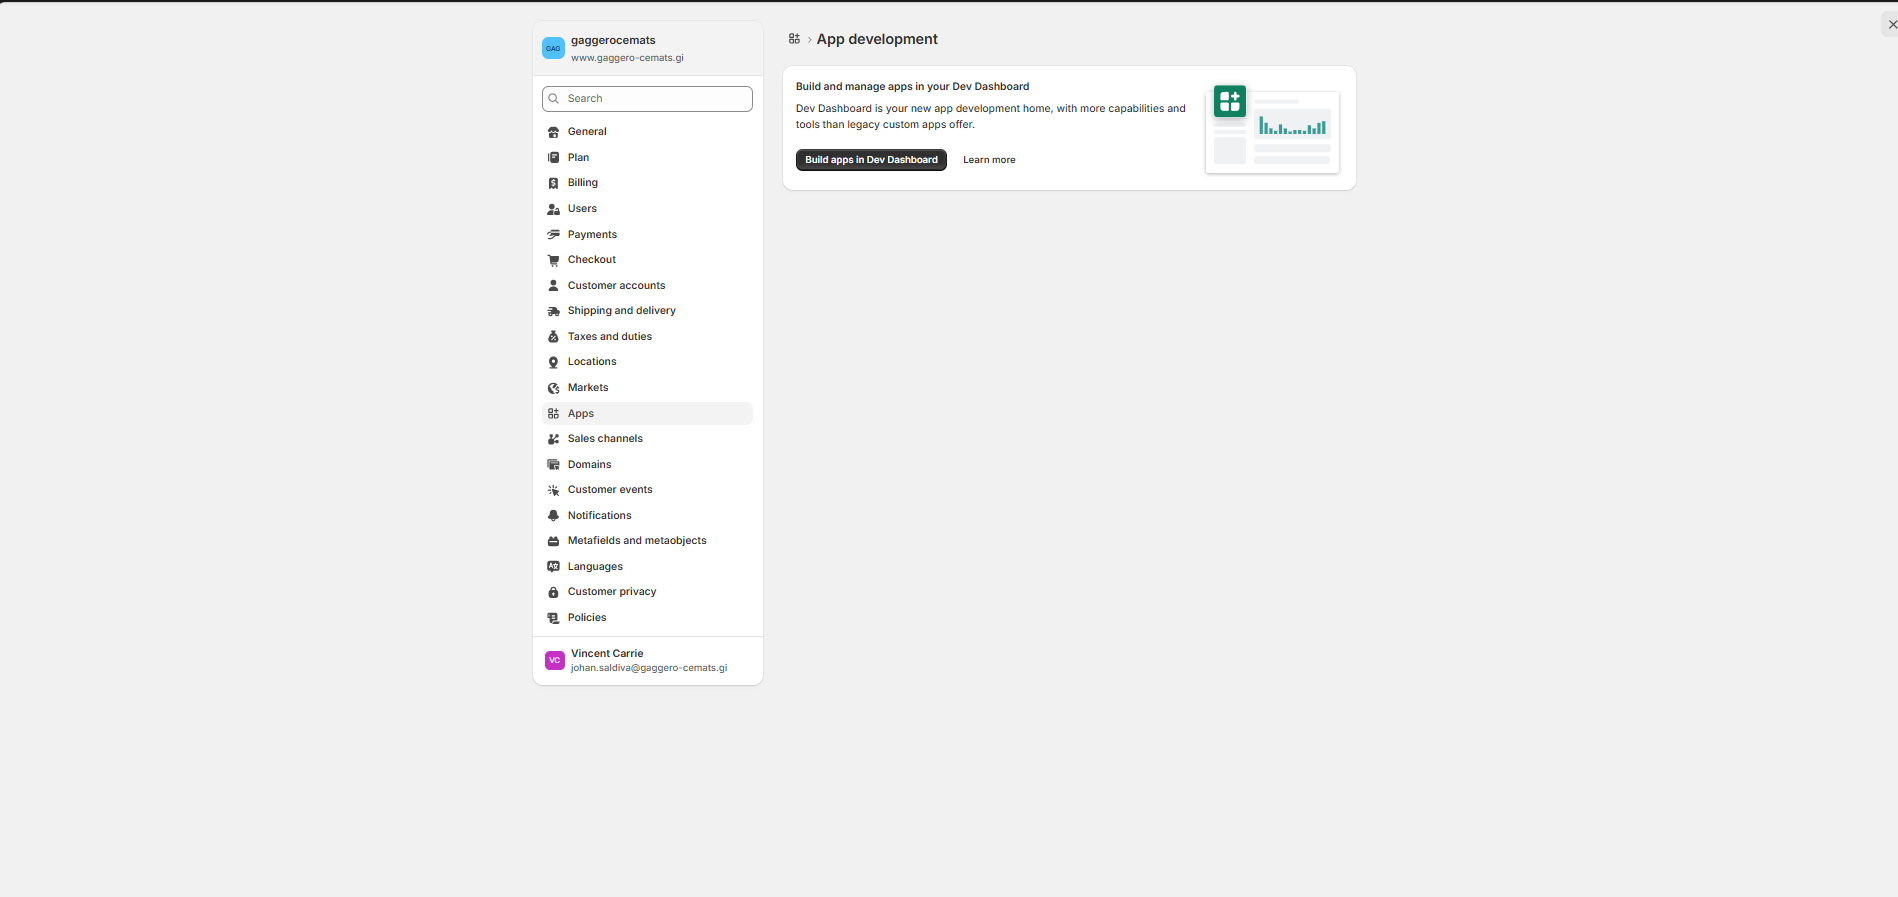
Then click Build apps in Dev Dashboard
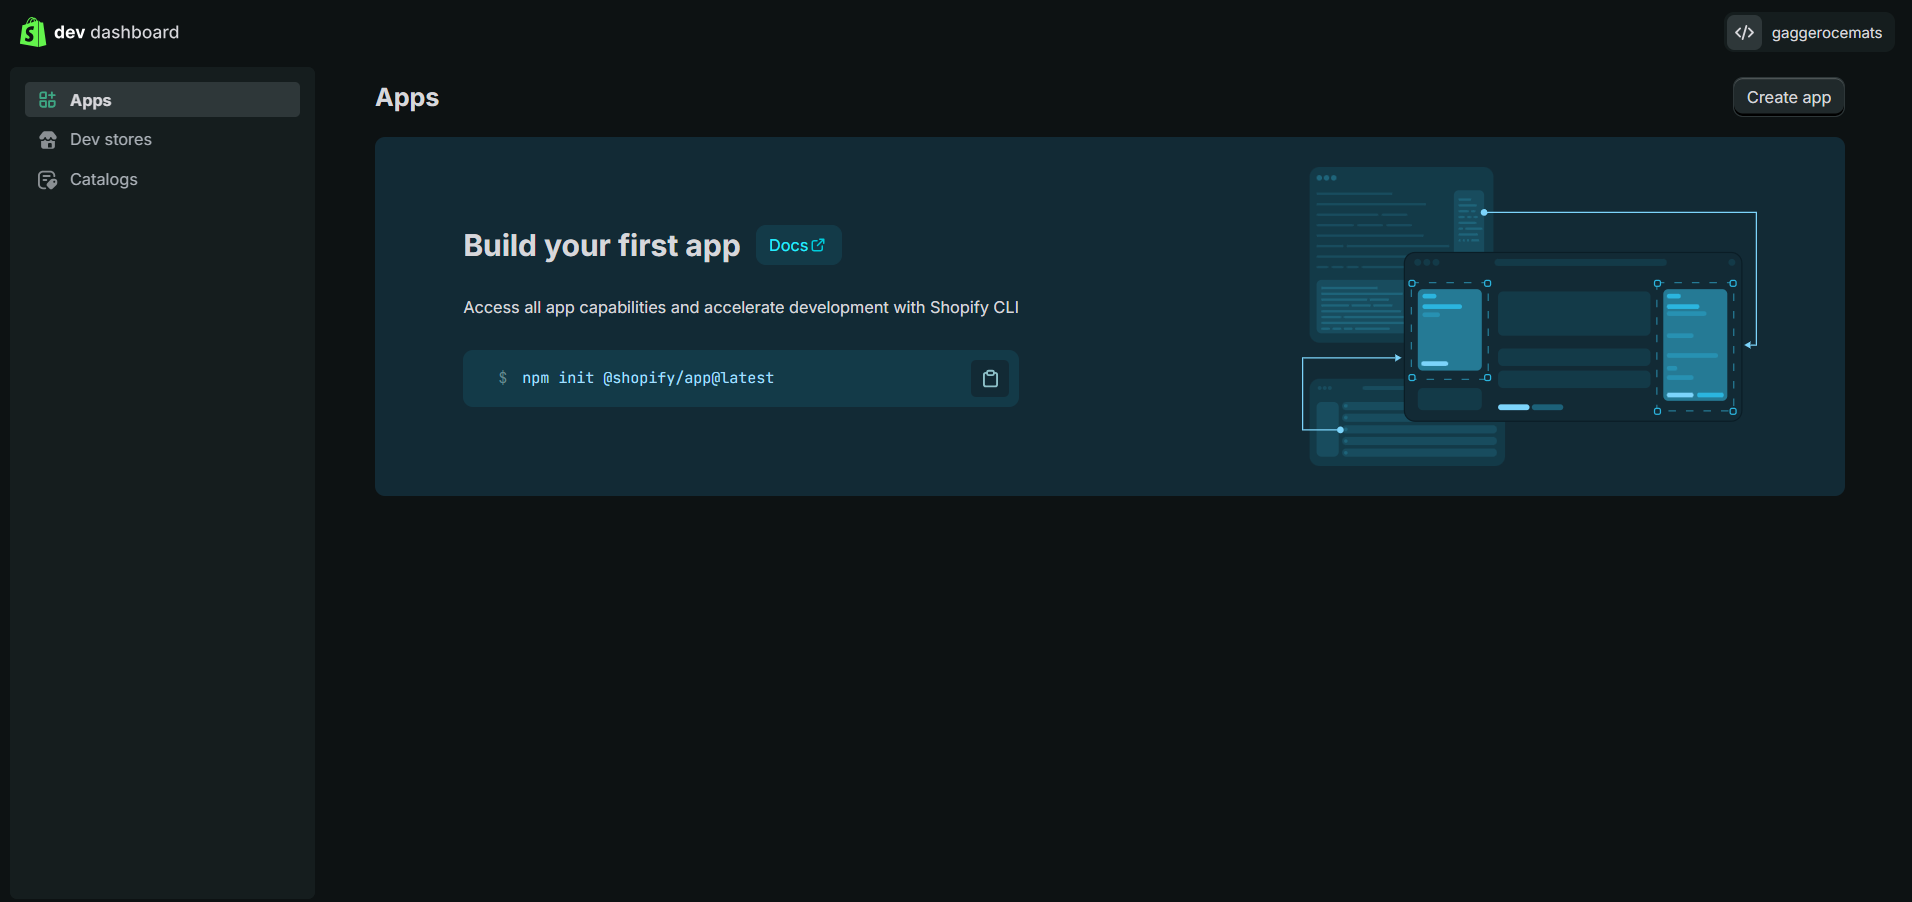
You will be taken to the Developper Dashboard. Click Create App.
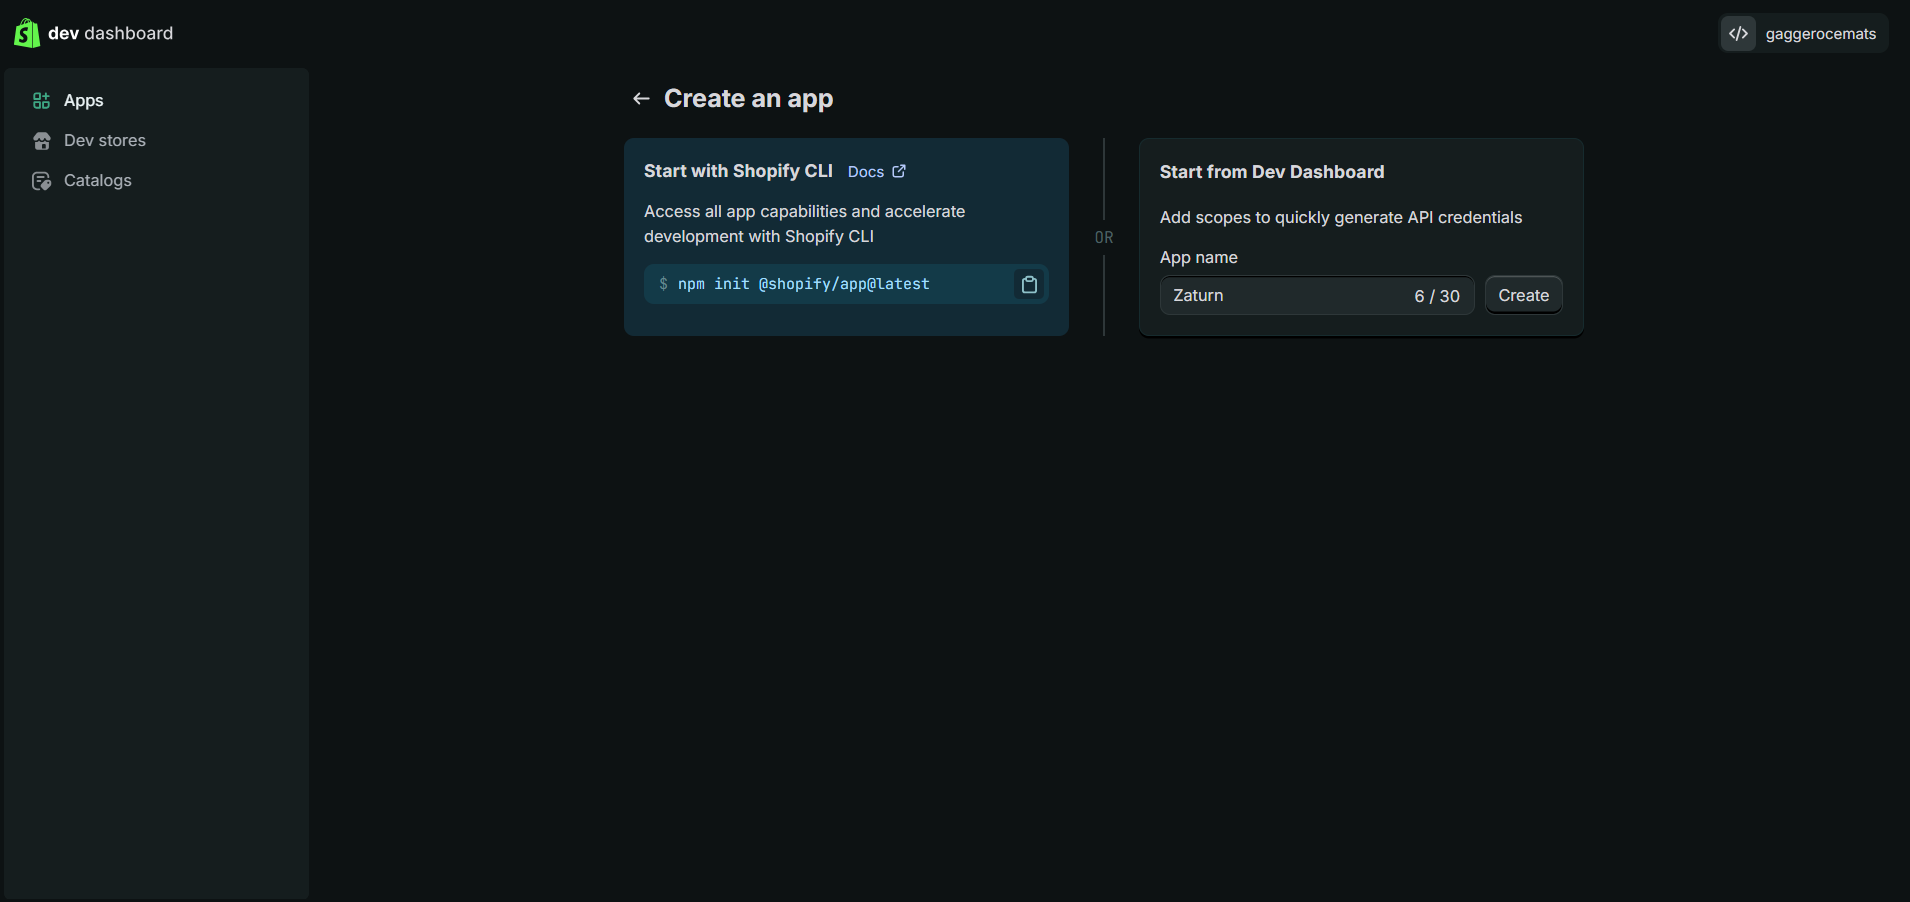
Once you're in, Start from Dev Dashboard and name the app Zaturn. Then click Create app to confirm.
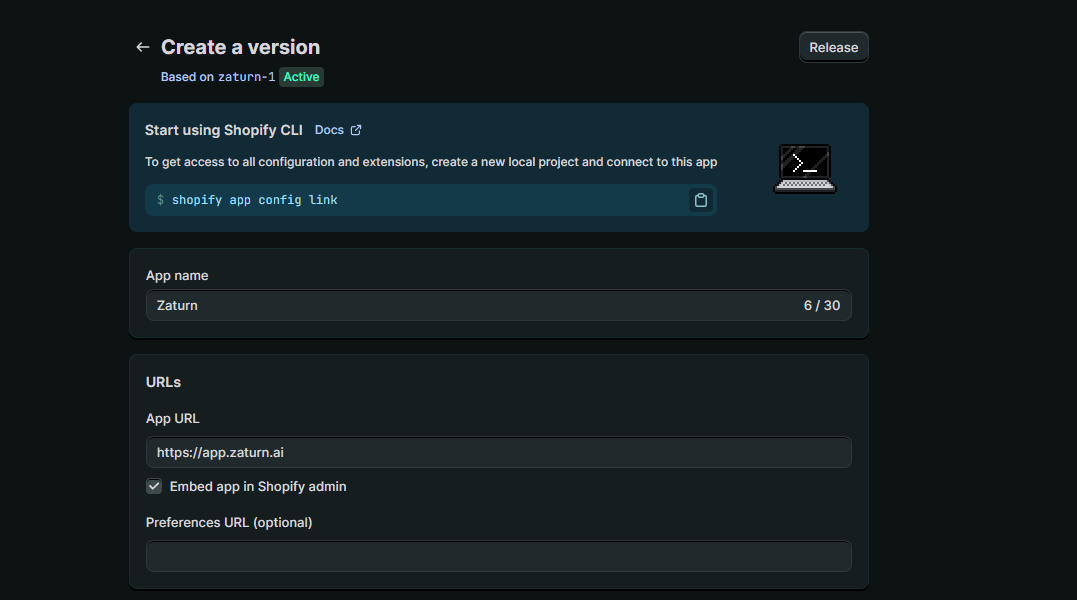
Step 2 — Set the App URL
Inside your new app, click the Configuration tab.
Under URLs, you'll see a field called App URL. Set it to:
<https://app.zaturn.ai>
Leave the Preferences URL blank. Click Save before moving on.
Step 3 — Set Your Permissions
Still on the Select scopes tab, click Select Scopes.
In the scopes search box, type, find and tick these two permissions:
write_contentread_content
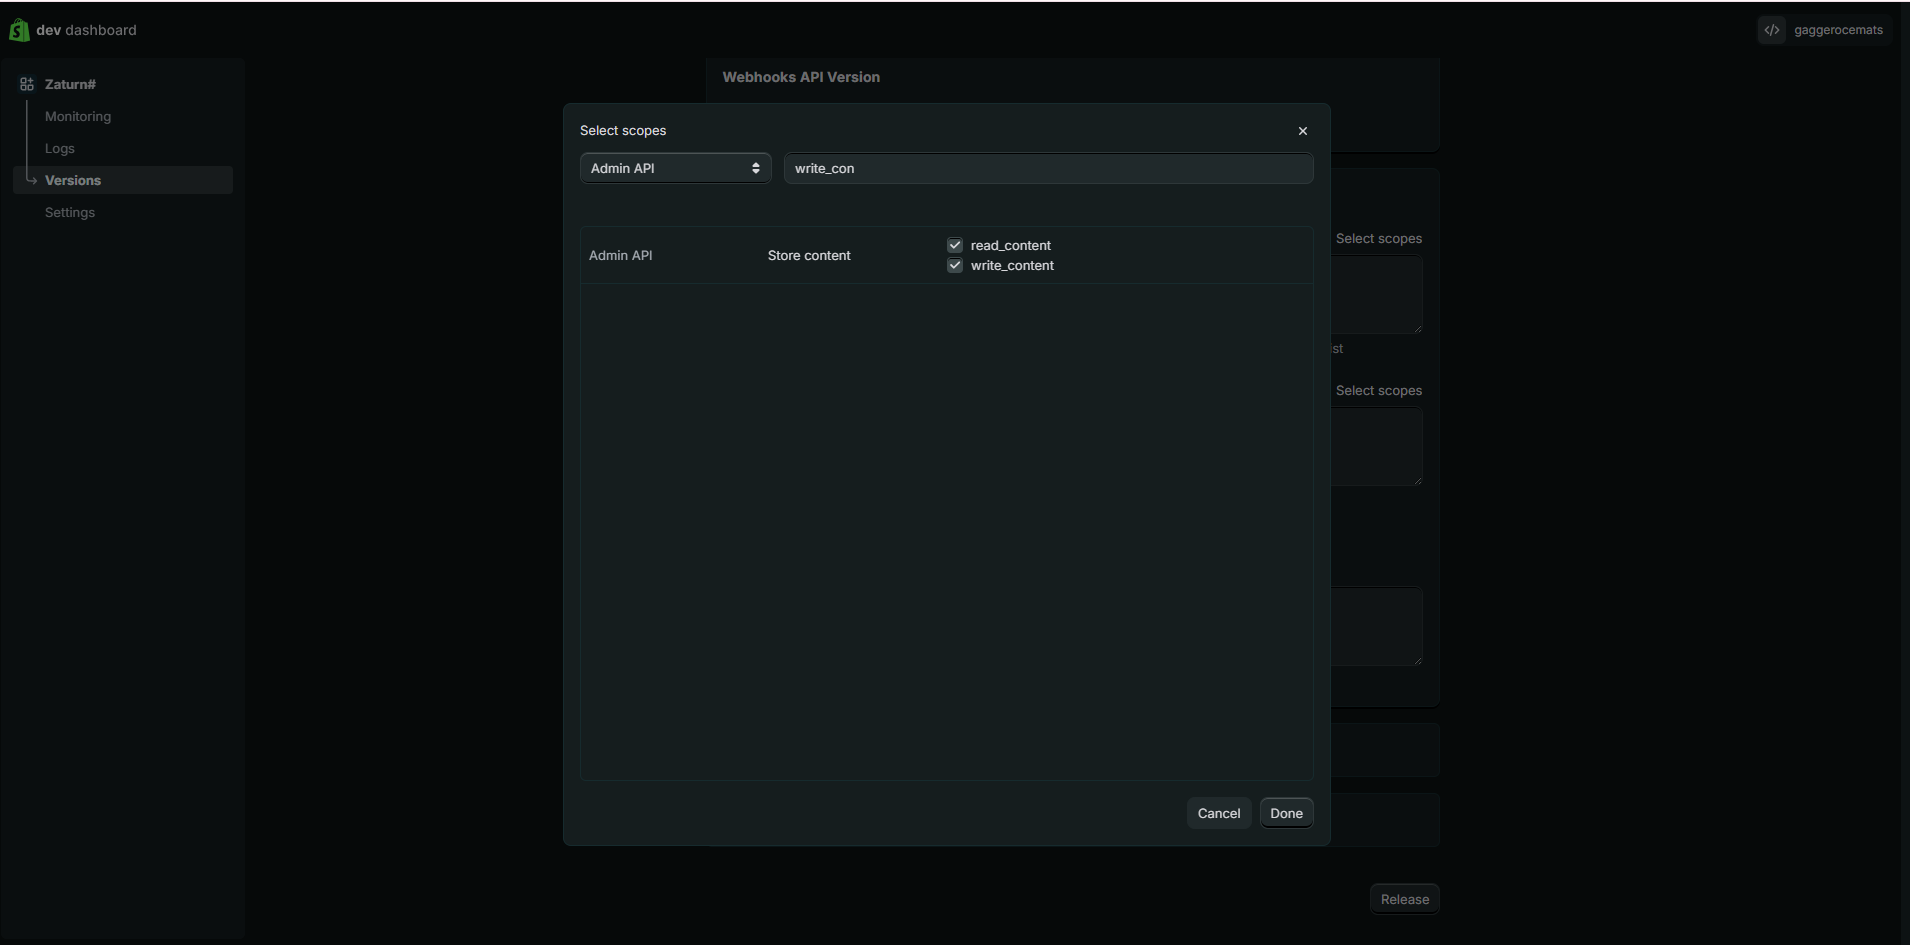
That's all Zaturn needs. Don't tick anything else. Click Save.
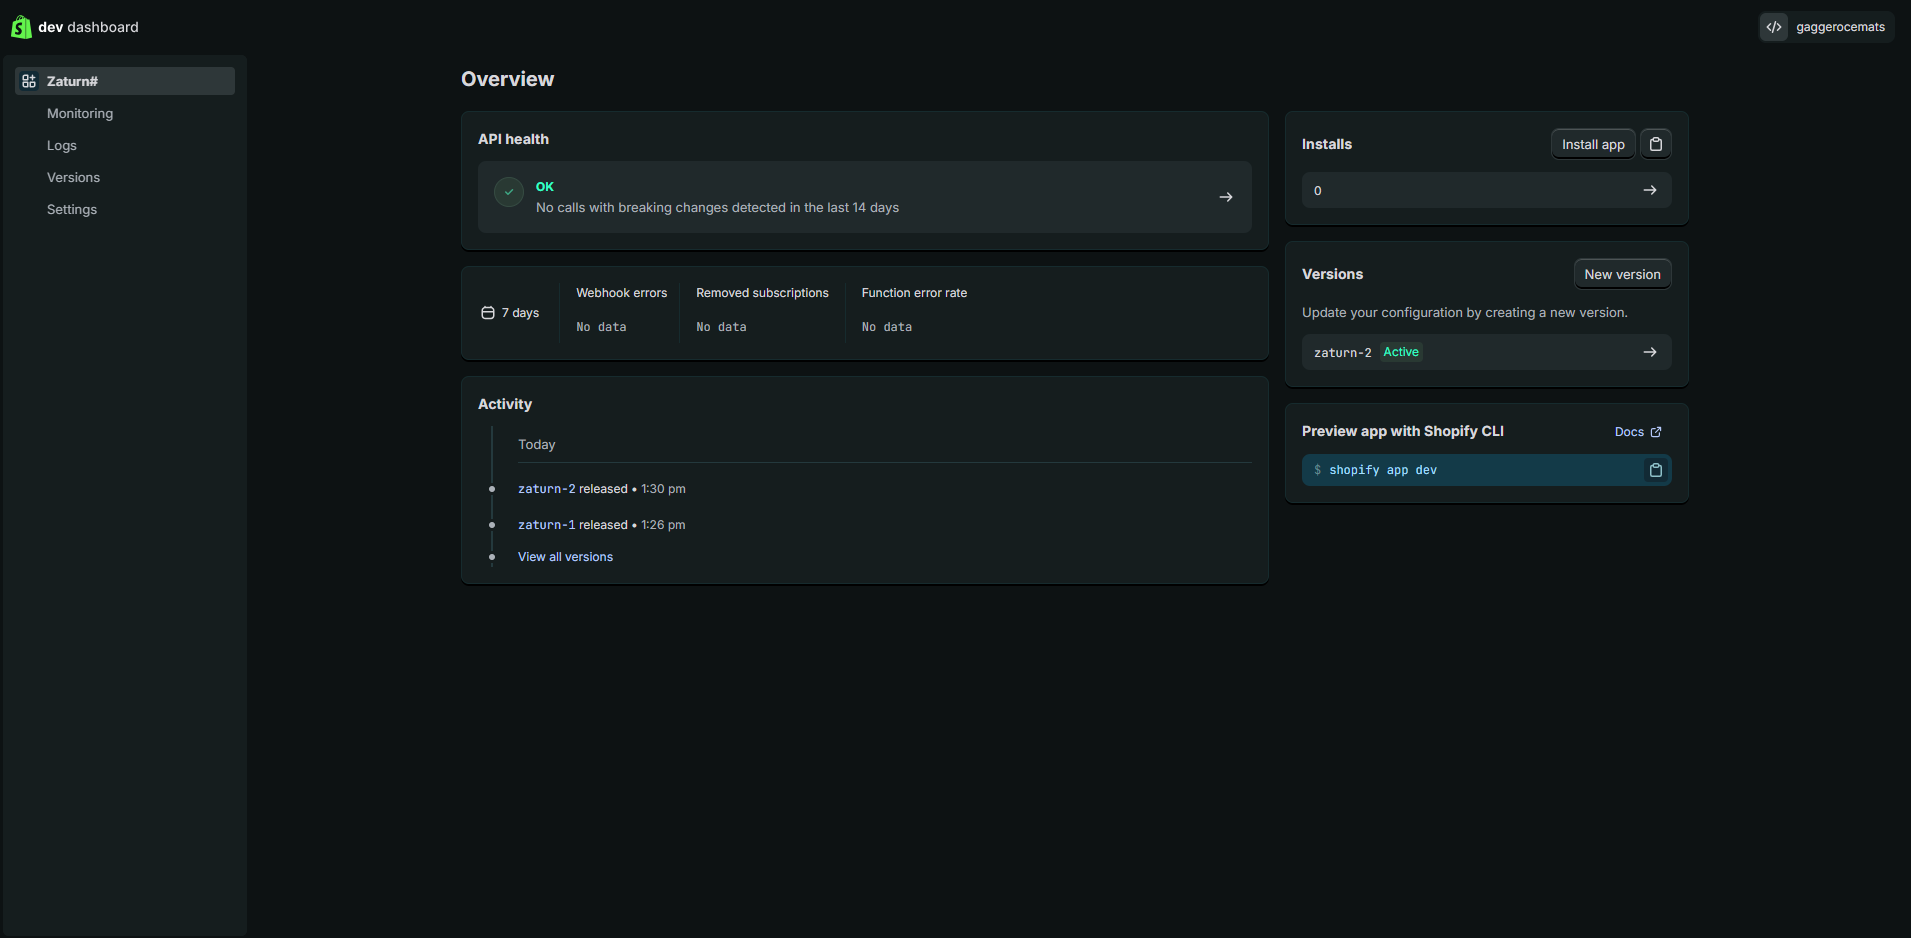
Step 4 — Release Your App
This step is easy to miss but important. Click the Release button in the bottom right corner of the page.
A small modal will appear asking for a version name and message. Leave both fields blank and click Release to confirm.
Your app won't work until it's been released, so don't skip this.
Step 5 — Install the App on Your Store
Once released, click Zaturn in the left menu. On the right side of the screen you'll see an Install app button. Click it and confirm when prompted.
You'll be briefly redirected to site — that's normal. It just means the connection is working.
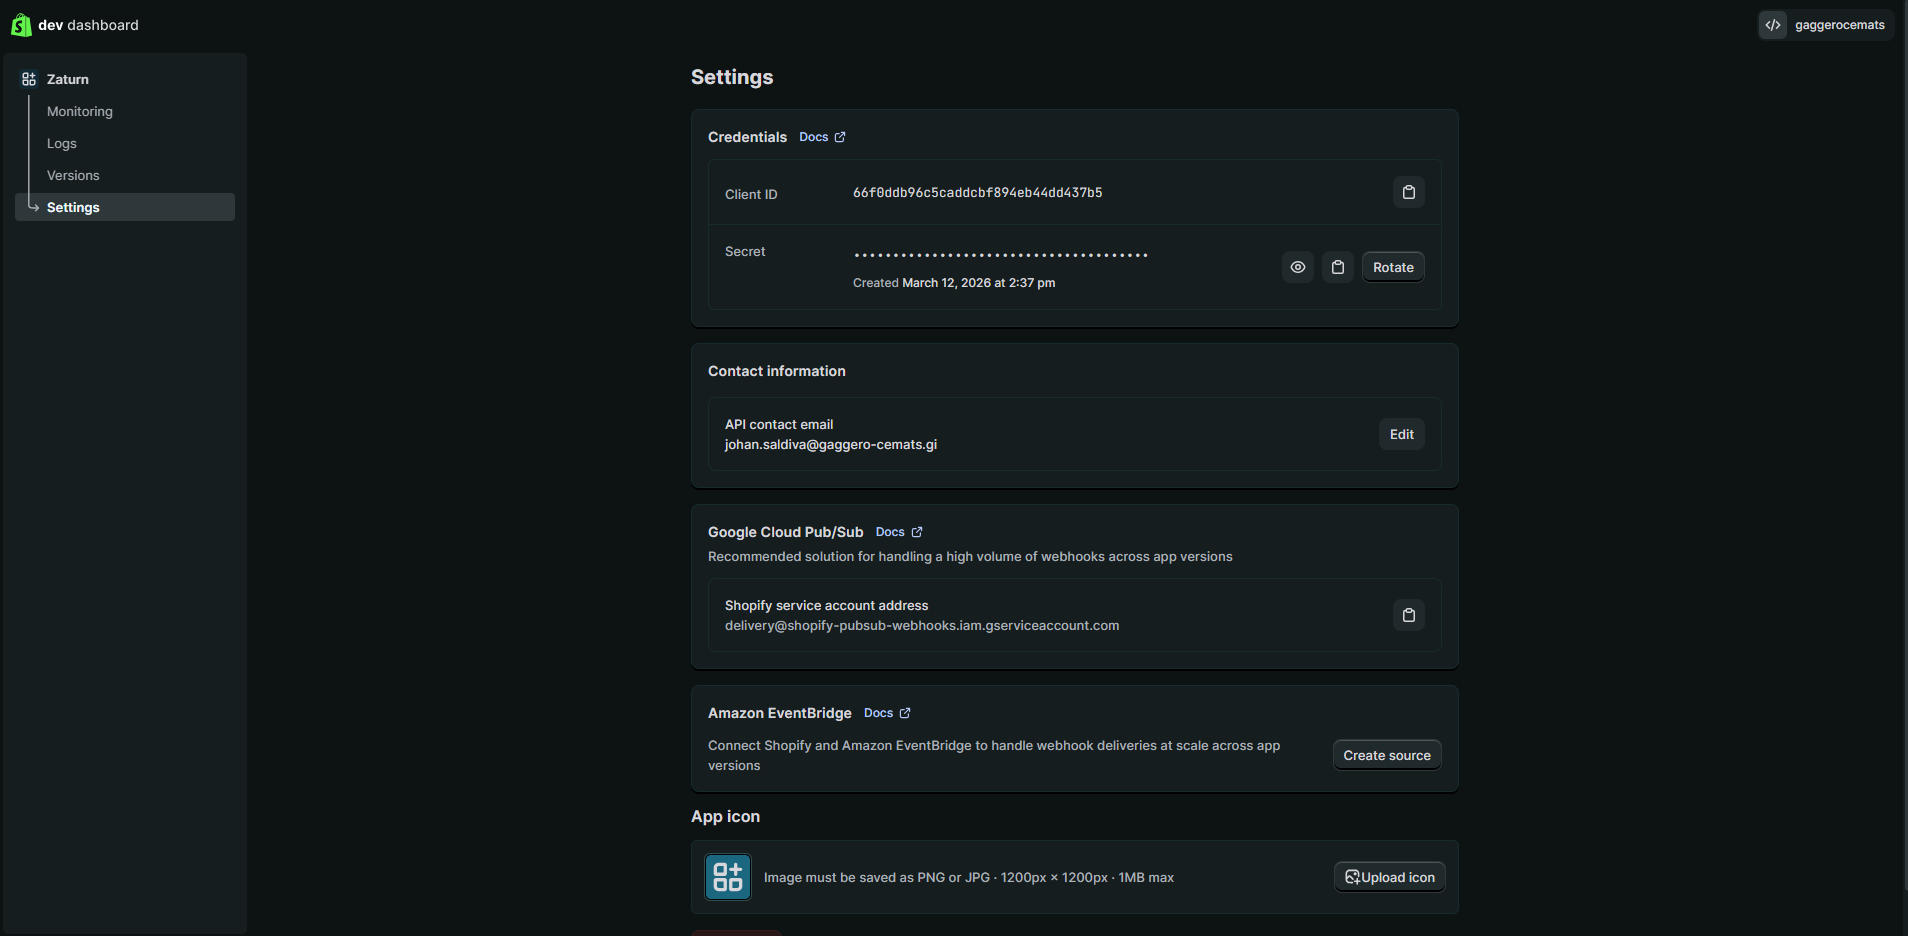
Step 6 — Copy Your Credentials
Go back to the Dev Dashboard and click Settings in the left menu.
You'll see two credentials:
Client ID — visible directly, click the copy icon
Secret — click the eye icon to reveal it, then copy it
Keep these handy for the next step.
Step 7 — Connect in Zaturn
Head to Settings → Integrations → Shopify inside your Zaturn account and click Connect.
You'll be asked for three things:
Your Shopify store URL — use your
.myshopify.comaddressYour Client ID — paste it from the previous step
Your Client Secret — paste it from the previous step
Click Test Connection. Zaturn will verify everything is set up correctly and show you the blogs available on your store.
Step 8 — Choose Your Default Publish Setting
Once connected, you'll be asked how you want Alex to publish articles:
Save as Draft — Alex creates the article as a draft. You review it in your Shopify admin before publishing. Recommended if you want a final check.
Publish Immediately — Alex publishes the article live as soon as you approve it in Zaturn.
You can change this at any time in Settings → Integrations.
Publishing Your First Article
Now the fun part. When Alex generates a blog post and you're happy with it, you'll see a Publish to Shopify section on the approval card.
Select your store, confirm the publish setting, and click Approve & Publish. Alex handles the rest — title, slug, meta SEO fields, schema markup, and all.
You'll get a direct link to view the article on your store the moment it's live.
That's It
Your Shopify store is now connected. Every time Alex writes a new article, one click sends it straight to your blog — fully optimised and ready to rank. No agency, no developer, no copy-pasting required.