How to Connect Zaturn to WordPress
Easily connect your WordPress site in 5 simple steps to get direct publishing from Alex at Zaturn
Alex is your SEO expert. Once connected to your WordPress site, he can publish SEO-optimised blog articles directly from Zaturn — complete with the right slug, meta title, meta description, and schema markup already in place. No copy-pasting. No reformatting. Just approve and it goes live.
What You'll Need
Before you start, make sure you have:
A WordPress site running version 5.6 or later
Admin access to your WordPress dashboard
Either Yoast SEO or RankMath installed (optional but recommended)
A Zaturn Account
The setup takes about 2 minutes and you only do it once.
Step 1 — Log Into Your WordPress Dashboard
Head to your WordPress admin. The URL usually looks like yourwebsite.com/wp-admin. Log in with your admin username and password.
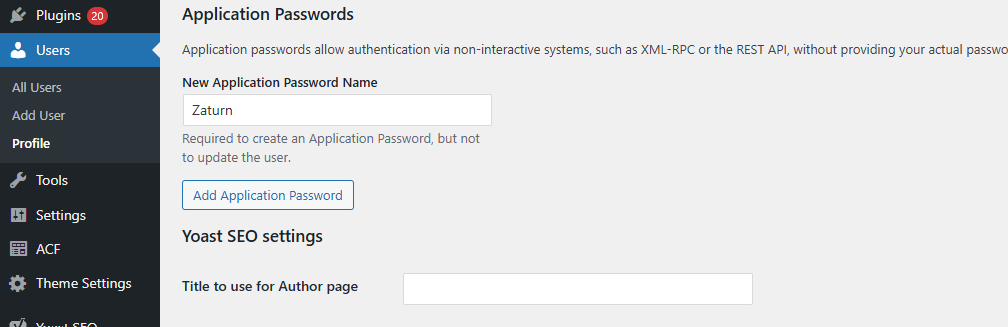
Step 2 — Go to Your Profile
In the left menu, click Users, then click Profile.

This opens your account settings page where you'll generate a password specifically for Zaturn.
Step 3 — Create an Application Password
Scroll down the Profile page until you see the Application Passwords section.
In the field labelled New Application Password Name, type Zaturn.
Then click Add New Application Password.
Step 4 — Copy Your Password
WordPress will generate a password and show it to you once. Copy it immediately — you will not be able to see it again.
It will look something like: AbCd 1234 EfGh 5678 IjKl 9012
Spaces in the password are normal. Paste it exactly as shown.

Step 5 — Connect in Zaturn
Head to Settings → Integrations → WordPress inside your Zaturn account and click Connect.
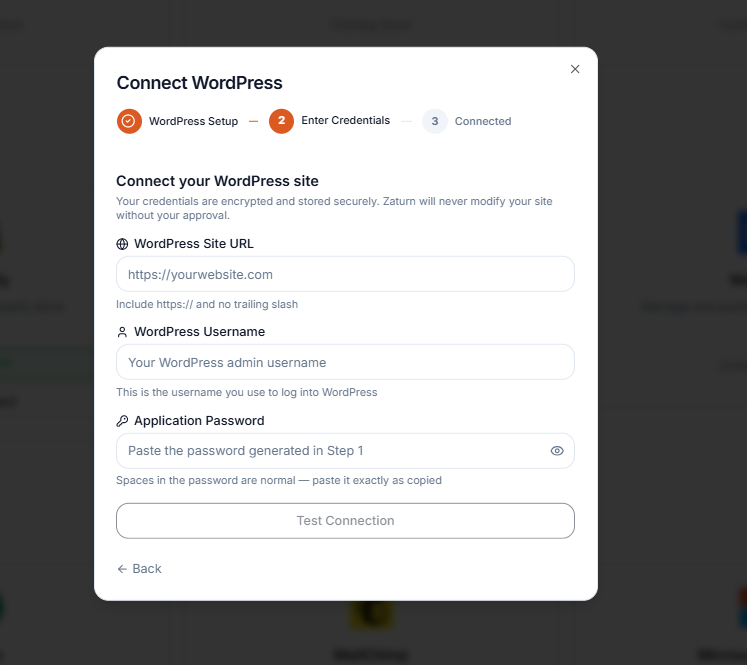
You'll be asked for three things:
WordPress Site URL — your full website address, e.g.
https://yourwebsite.comWordPress Username — the username you use to log into WordPress
Application Password — paste the password you just copied
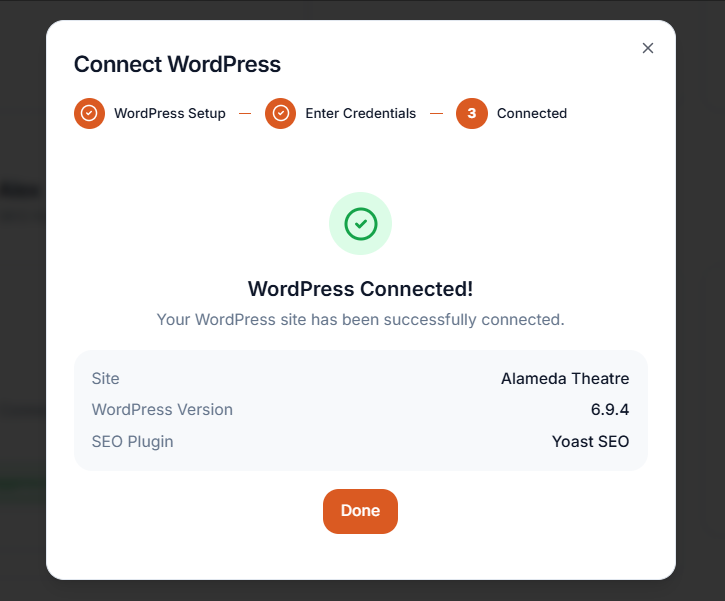
Click Test Connection. Zaturn will verify the credentials and automatically detect whether you're running Yoast SEO or RankMath so it knows where to write your SEO fields.
Publishing Your First Article
Now the fun part. When Alex generates a blog post and you're happy with it, you'll see a Publish to WordPress section on the approval card.
Select your site, confirm the publish setting, and click Approve & Publish. Alex handles the rest — title, slug, meta SEO fields, schema markup, and all.
You'll get a direct link to view the post on your site the moment it's live.
A Note on WordPress.com Sites
This integration works with self-hosted WordPress sites (where you manage your own hosting). If your site is hosted on WordPress.com, the setup is slightly different. If you're not sure which one you have, check your hosting provider or contact us and we'll help you figure it out.
That's It
Your WordPress site is now connected. Every time Alex writes a new article, one click sends it straight to your blog — fully optimised and ready to rank. No agency, no developer, no copy-pasting required.